Limelight 4 クイックスタート
ハードウェア仕様
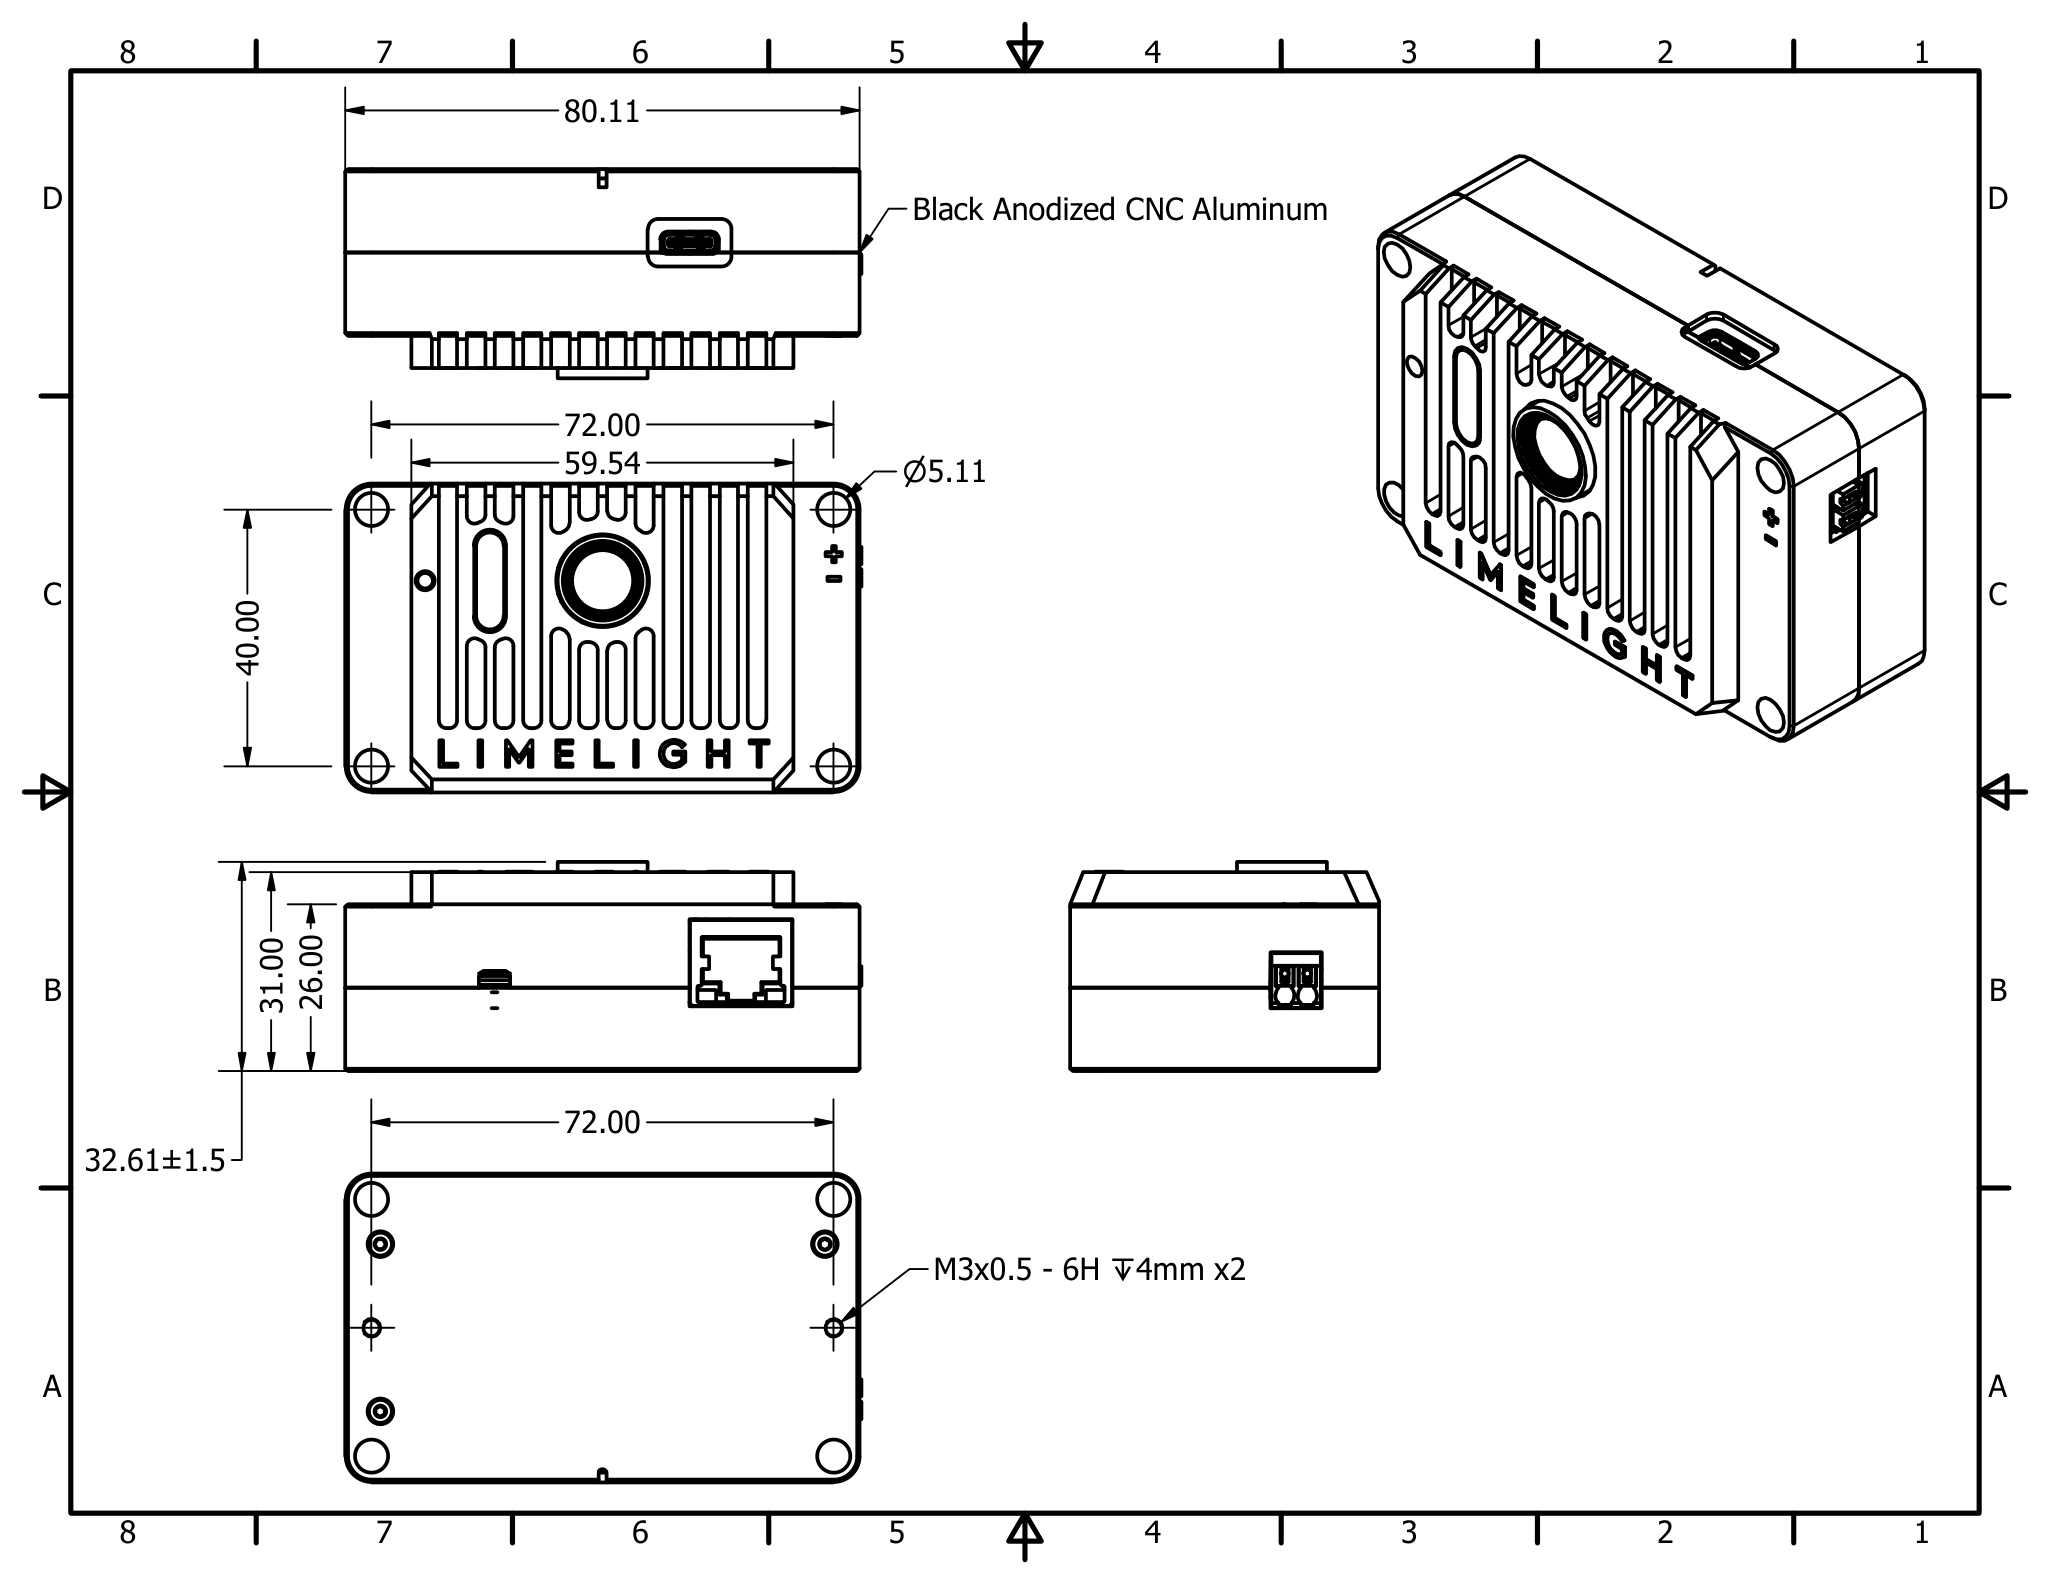
- フットプリント: 3.154in x 1.894in (80.11mm x 48.11mm)
- 厚さ: 1.160in (29.46mm)
- 重量: 0.3 lb
- #10 / M4 貫通穴マウント
- M3 ネジ穴マウント
- 電源入力: バックブーストコンバーター 5V-26V動作 (絶対最大定格 3.5V - 35V)
- ロボティクスアプリケーション向けの強化された過渡抑制
- 最大消費電力 12W
- センサー: OV9281 グローバルシャッター モノクロ (1280x800 @ 120FPS, 640x400 @ 240FPS)
- IMX462 裏�面照射型アップグレードキット 近日発売予定
- 交換可能なM12レンズ
- 水平視野角 82度、垂直視野角 56.2度
- ブラックアルマイト処理 オールアルミニウム筐体
- ギガビットイーサネット RJ45ポート (POEはサポートされなくなりました)
- Weidmuller電源入力ポート
- USB C イメージングおよび接続ポート
- 内蔵IMU
- 内蔵M.2 A+Eキーポートによる Hailo 8 AIアクセラレータサポート
ソフトウェア機能 (Limelight OS)
- プラグアンドプレイの高性能ビジョン。経験不要。
- ビジョンパイプライン設定用のセルフホスト型ブラウザベースUI
- REST/HTTP、Websocket、NetworkTables、ModbusTCP、ROSサポート
- Windows、Linux、MacOS、Androidでのプラグアンドプレイ USB-Ethernetドライバーサポートによる USB接続
- ドラッグアンドドロップ 20FPS MobileNetSSD物体検出ニューラルネットワークサポート (CPU推論)
- ドラッグアンドドロップ 80FPS YoloV8物体検出ニューラルネットワークサポート (Hailo-8が必要)
- 設定可能な固定露出、センサーゲイン、解像度、フレームレート
- 10個のホットスワップ可能なビジョンパイプラインを設定:
- OpenCV 4.10、numpyなどを使用したカスタムPythonパイプライン
- 2D、3D AprilTagトラッキングとロボットローカリゼーション
- MegaTag1によるフル3Dローカリゼーション (ロボットGPS)
- MegaTag2による外部IMU融合を使用した高精度フル3Dローカリゼーション (ロボットGPS)
- 高精度MegaTag2のための内蔵IMU融合
- 内蔵IMUと外部IMUまたはカメラベースのヨー推定を融合するIMUアシストモード
- 検出器ダウンスケーリングによる最大240FPSパフォーマンス
- Webインターフェースでのフル3Dビジュアライザー
- 120-240FPS カラーブロブパイプライン
- ニューラル物体検出パイプライン
- ニューラル画像分類パイプライン
- バーコードトラッキングパイプライン
- レンズフォーカシングパイプライン
- 低遅延ストリーミング用ビューファインダーパイプライン
- 高精度ビジョンパイプライン用の内蔵Charuco内部パラメータキャリブレーションインターフェース
- 内部パラメータキャリブレーションの可視化
- 内蔵低遅延MJPEGストリーミング。設定可能なストリーム方向
既知の問題
- ダウンスケーリング有効時のHailoアクセラレーテッドAprilTagフレームレートが低すぎる (ソフトウェアアップデートで対応予定)
- スロットリング有効時のNetworkTablesからの温度読み取りが正確でない (ソフトウェアアップデートで対応予定)
1. Limelight 4の取り付け
貫通穴マウント
- 1 1/4" #10-32または#10-24ネジとナイロックナットを使用
- または、38mm M4ボルトとナイロックナットを使用
- アルマイト処理を保護するためにプラスチックワッシャーを使用
ネジ穴マウント (背面)
- 2x M3ネジ穴マウントポイント
- ネジロック剤の軽い塗布を検討
2. Limelight 4の配線
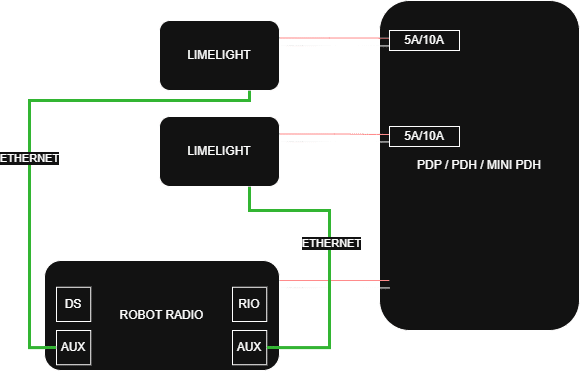
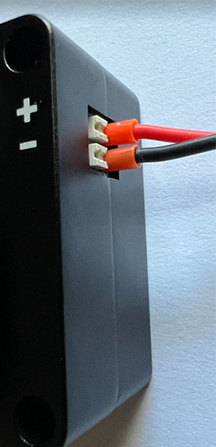
電源
- Limelightから PDP、PDH、またはMini PDPのスロットまで 18-20AWGワイヤーを2本配線
- 5Aまたは10Aブレーカーを使用
- POEはサポートされなくなりました
- 注意: 以前のモデルとは異なり、LL4は専用VRMを必要とせずにバッテリー切断や回生ブレーキイベントに耐えることができます
- (必須ではない) 最適な結果を得るためにWeidmullerフェルールを使用 (写真は20AWGワイヤーとWeidmuller 20AWGオレンジフェルール)
- フェルール:
- 低コストフェルール圧着工具:
イーサネット
- Limelightからロボットラジオまでイーサネットケーブルを配線
- より線のツイストCat6ケーブルを使用 (理想的には20AWG)
- イーサネットケーブルにストレインリリーフを追加
- POEはサポートされなくなりました
USBフラッシング
- フラッシュモードに入るには、USB C接続中に設定ボタンを押し続けます
- フラッシング中は、USB経由でLimelight 4に電源を供給しても安全です
USB-Ethernetインターフェース
- Limelight 4には、Windows、Linux、MacOSでプラグアンドプレイ接続を可能にするUSB-Ethernet機能があります。USB経由でWebインターフェースやその他すべての機能を使用できます。
- このインターフェースを使用中、Limelight 4はほとんどのUSBポートの定格電力を超えます。USB-Ethernet使用中はWeidmullerポート経由でLimelight 4に電源を供給することをお勧めします。
- Windows上のLimelight 4設定UI (USB-Ethernet): http://172.28.0.1:5801
- Linux上のLimelight 4設定UI (USB-Ethernet): http://172.29.0.1:5801
3. Webインターフェースへのアクセス
Limelight 4をネットワークに接続した後:
- ロボットの電源を入れ、ラップトップをロボットのネットワークに接続
- 以下のいずれかの方法でWebインターフェースにアクセス:
- 方法1: Limelight Hardware Managerアプリケーションを開き、Limelightをスキャンし、表示されたLimelightをダブルクリック
- 方法2: Webブラウザを開き、
http://limelight.local:5801に移動 - 方法3: Webブラウザを開き、Limelightの静的IPアドレスにポート5801を付けて移動 (設定済みの場合)
- 方法4 (USB): USB-C経由で接続し、以下に移動:
- Windows: http://172.28.0.1:5801
- Linux/Mac: http://172.29.0.1:5801
接続すると、以下にアクセスできます:
- 設定タブ - チーム番号、ホスト名、その他のシステム設定を構成
- ビジョンパイプラインタブ - ビジョン処理パイプラインの設定と調整
- カメラ&クロスヘアタブ - カメラ設定とクロスヘアパラメータの調整
- 3Dビジュアライゼーションタブ - リアルタイムAprilTag検出とローカリゼーションの表示
すべての設定はこのWebインターフェースを通じて行います。変更はLimelightに自動的に保存されます。
4. LimelightOSのアップデート
注意
アップグレード前にパイプラインとスクリプトをバックアップしてください - このプロセス中に消去されます!
- Limelightの電源を切る
- 最新のUSBドライバー/RPIboot、Limelight OSイメージ、Balena Flashツールをダウンロード
- ラップトップからLimelightにUSB-Cケーブルを接続しながら設定ボタンを押し続ける
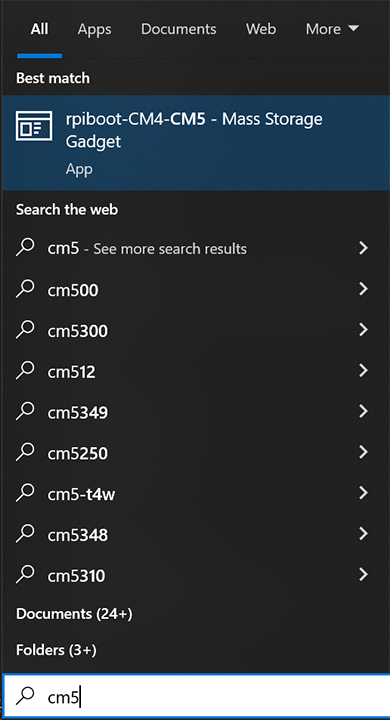
- Windowsスタートメニューから「rpiboot-CM4-CM5 - Mass Storage Gadget」を実行
RPIBootがLimelightを正常にマウントした場合、以下が表示されます。
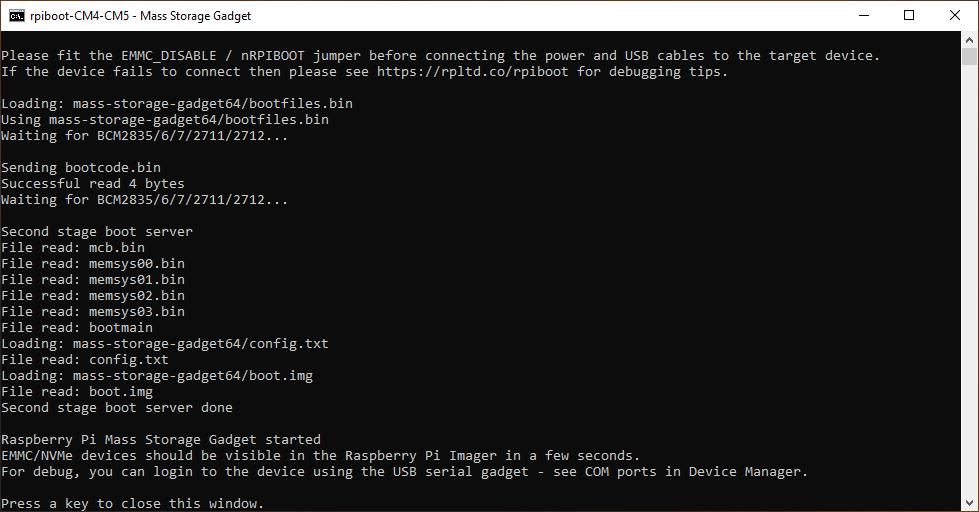
それ以外が表示された場合は、USBケーブルを外し、ボタンを再度押し、USBケーブルを再挿入し、rpibootユーティリティを再起動してください。
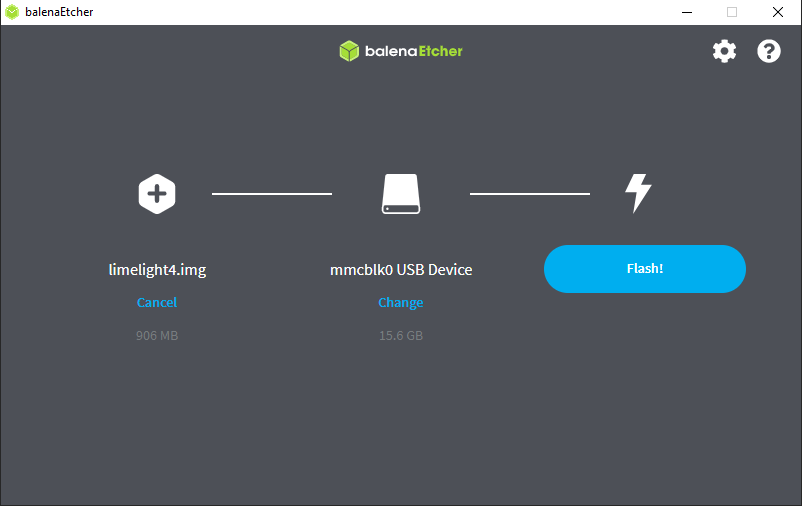
- 「Balena Etcher」を管理者として実行
- 「Flash From File」をクリックし、最新の.zipイメージを選択
- 「Select Target」をクリックし、「Drives」メニューで「mmcblk0 USB Device」を選択
- 「Flash」をクリ��ックし、完了を待つ
- 完了したらUSBケーブルを外す
5. Limelight 4のフォーカス調整
- ロボットの電源を入れる
- セクション3で説明したようにWebインターフェースに接続
- 「Ignore NT pipeline index」をクリックしてパイプライン切り替えを有効にし、パイプライン9に切り替え
- パイプラインタイプを「focus」に設定
- 設定タブに移動し、ストリーム品質を最大に上げる
- カメラがARUCOボード、詳細なシーン、ジーメンススターなど、多くの特徴とコントラストのあるものに向いていることを確認
- レンズを回して画面上のフォーカススコアを最大化
- フォーカスが合ったら、レンズの周りに3〜8点の瞬間接着剤または瞬間接着剤ジェルを塗布
6. ネットワーク設定
チーム番号の設定 (FRC / Networktablesに必須)
- ロボットの電源を入れ、ラップトップをロボットのネットワークに接続
- Limelight Hardware Managerを開き、Limelightをスキャンし、表示されたエントリをダブルクリック
- または、http://limelight.local:5801に移動
- 「Settings」タブに移動
- チーム番号を入力し、「Update Team Number」を押す
一意のホスト名の設定 (複数のLimelightを使用するFRC / Networktablesシステムにのみ必要)
- 複数のLimelightを使用する場合、各Limelightには一意のホスト名が必要です
- 設定タブでホスト名を設定し、「set hostname」ボタンをクリック
静的IPの設定 (推奨、必須ではない)
- 「IP Assignment」を「Static」に変更
- IPアドレスを「10.TE.AM.11」に設定
- チーム916は10.9.16.xxを使用
- チーム9106は10.91.6.xxを使用
- チーム9016は10.90.16.xxを使用
- ネットマスクを「255.255.255.0」に設定
- ゲートウェイを「10.TE.AM.1」に設定
- 「Update」をクリック
- ロボットの電源を入れ直す
- 10.TE.AM.11:5801で設定パネルに、10.TE.AM.11:5800でカメラストリームにアクセス
- 複数のLimelightを使用する場合、各Limelightに一意の静的IPアドレスを割り当てます。ゲートウェイとネットマスクはLimelight間で同じにする必要があります。
Q. なぜ静的IPアドレスの使用を推奨するのですか?
A. Limelightの起動時間を数秒短縮できます。 また、チームは実際のFRCフィールドやイベントラジオファームウェアで DHCP割り当てやmDNSレスポンダーに関する問題を経験してきました。
robo-rioとドライバーステーションにも静的IPアドレスを設定することをお勧めします。 これらすべてのデバイスで使用するネットワーク設定は、 このWebページの下半分付近で確認できま�す。
7. Limelight 4の熱管理
Limelight 4の熱出力は、無効時にThrottleパラメータを100-200に設定し、有効時に0に設定することで削減できます。 または、無効時にビューファインダーパイプラインに切り替えることもできます。
8. Hailo AIアクセラレータモジュールの取り付け (オプション)
オプションのHailo AIアクセラレータモジュールをお持ちの場合、以下の手順で取り付けます:
- 付属のサーマルパッドをHailo SOC (System on Chip)に貼り付け
- 付属の1.5mm六角レンチを使用して、3本の8mm M2筐体ネジを外す
- これらのネジを脇に置く (ネジロック材が付いています)
- 筐体を慎重に開く (注意: カメラケーブルにより開ける範囲が制限されます)
- Hailoモジュールを適切なスロットに挿入
- Hailoモジュールを固定するためのネジは不要
- 元の3本の8mm M2ネジを使用して筐体を再取り付け
- Hailoモジュールを取り付けた後、LimelightOSを最新バージョンにアップデートしてください
警告
Hailoアクセラレータモジュールは USB電源では動作しません。適切に機能するには、メインロボットバッテリーのような安定した12V電源が必要です。
8. トラブルシューティング
ステータスバーインジケーター
- 遅いサイロン (スキャン): 現在のパイプラインでターゲットが検出されていない
- 速いサイロン (スキャン): 現在のパイプラインでターゲットが検出された
- 遅い交互LEDブリンク: ハードウェアエラー (カメラケーブル切断、センサー損傷など)
limelight.local:5801が機能しない場合
- Bonjourがインストールされているか確認 (Windows: プログラムの追加と削除)
- Bonjourの項目が2つある場合は「bonjour print services」をアンインストール
- 見つからない場合はダウンロードページからBonjourをインストール
IPアドレスのリセット
- Limelightが起動した後、設定ボタンを10秒間押し続ける
- 次回起動時にネットワーク設定が動的アドレス指定にリセットされます