ChArUco Camera Calibration
Why Does This Matter?
A fully calibrated camera will provide more accurate 2D and 3D measurements. It's useful for any task that is not based on "servoing" to the crosshair.
With that being said, we recommend using the "servoing" method as often as you can. It's fast, precise, and suitable for tasks such as object acquisition, aiming, and aligning to targets. Don't worry about calibration unless you determine that you need greater accuracy. Every LL unit comes with a default calibration that will provide fairly good results for most use cases
"servoing" is the process of turning your robot until your target is perfectly aligned with a configurable "crosshair". It is the easiest, and in many cases, the most reliable way to appraoch vision problems in robotics.
What is Camera Calibration?
Intrinsics calibration is the process of determining the two following components:
1. The Camera Matrix
The camera matrix, often denoted as K, is a 3x3 matrix that describes how the lens and sensor turn the 3D world into a 2D picture.
[fx  0   cx]
[0   fy  cy]
[0   0   1]
cx and cy are the coordinates of the principal point / principal pixel. The principal point / principal pixel is the pixel that is directly aligned with the optical axis / center of the lens. During manufacturing, the camera lens is almost never perfectly aligned with the center of the image sensor. It is crucial that we understand which pixel is the true "center" pixel
fx and fy are computed focal lengths in pixels. fx and fy help us understand the field of view / zoom level of the camera.
2. Distortion Coefficients
We compute 5 distortion coefficients:
[k1, k2, p1, p2, k3]
k1, k2, k3 are radial distortion coefficients which cause straight lines to appear curved.
p1, p2 are tangential distortion coefficients which occur due to the lens not being parallel to the image plane
Performing ChArUco Calibration
ChArUco calibration with Limelight was designed to be as seamless and bullet-proof as possible. Read the following steps, and then watch the video below to learn how to calibrate your camera for increased accuracy.
You only need to calibrate at one resolution (we recommend 1280x960 for LL3 and 1280x800 for LL3G). Intrinsics are auto-scaled to match your pipeline's chosen resolution, and distortion coefficients are resolution-invariant given a fixed aspect ratio and FOV. Hardware zoom pipelines and 5-megapixel pipelines are the only pipelines that will not make use of custom calibrations.
Preparing the Board
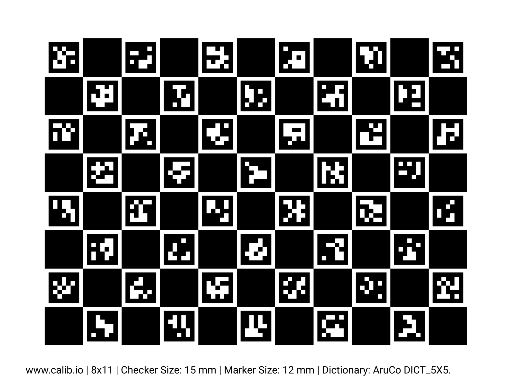
You can use any laptop screen to calibrate your camera. For maximum accuracy, however, we recommend purchasing this coarse 800mmx600mm board from calib.io
- Print a ChArUco Calibration Board or use an image of a board on a large laptop or computer screen. Use our board from the downloads page, or generate your own.
- Find the "width" of the grid by adding the total number of black squares and total number of ArUco markers in one row (11 for the default Limelight calibration board).
- Find the "height" of the grid by adding the total number of black squares and total number of ArUco markers in one column (8 for the default Limelight calibration board).
- Confirm the "square size" and "marker size" measurements by measuring the side lengths of a square and a marker in millimeters.
- The square size and marker size measurements are critical, so use calipers.
- Note the dictionary type. The default board from the downloads page uses the 5x5_100 dictionary.
Capturing Calibration Images
The 2026.0 update introduces a streamlined calibration workflow with a live video preview. You can now see your ChArUco detections in real-time before capturing images.
- Ensure your board is as flat as possible.
- You should not perform calibration if your board is not flat. You may purchase special boards from calib.io, or fix your printed board to a clipboard.
- Turn on your robot and access the Limelight web UI.
- Create a "Charuco Calibration Preview" pipeline.
- Configure the charuco board settings (width, height, square size, marker size, dictionary) to match your board.
- You will now see a live preview of detected corners overlaid on the video stream. This lets you verify your board configuration is correct before capturing any images.
- Delete all saved snapshots by changing the "input" source type from "Camera" to "Snapshot" and clicking "Delete all snapshots".
- Change the "input" source type back to "Camera".
- Capture at least 25 snapshots of the ChArUco board to begin. Once you're familiar with the process, you'll want to go back to capture a total of at least 50 images.
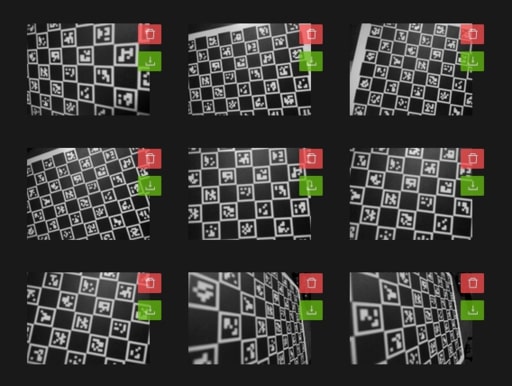
- The main advantage of ChArUco calibration over standard checkerboard calibration is that it works even if only part of the board is visible to the camera. It is important to utilize this advantage.
- Your images should have a good mix of the following qualities:
- Your board spans large regions of the image.
- Your board extends past at least one edge or corner of the image (This will help compute distortion around the edges of the images).
- Your board is often positioned such that it has perspective warp (The board should not be parallel to the image plane).
- Aim for broad diversity in board positions, perspectives, and coverage.
- 50% of your images should illustrate significant foreshortening. This is the effect of closer markers appearing larger than far away markers. The first and last images in the following screenshot demonstrate foreshortening
Calibrating
- Navigate to the "Calibration" tab. It's the third tab in the vertical sidebar.
- Click the "Calibrate with Snapshots" button. The process may take a minute or two to complete.
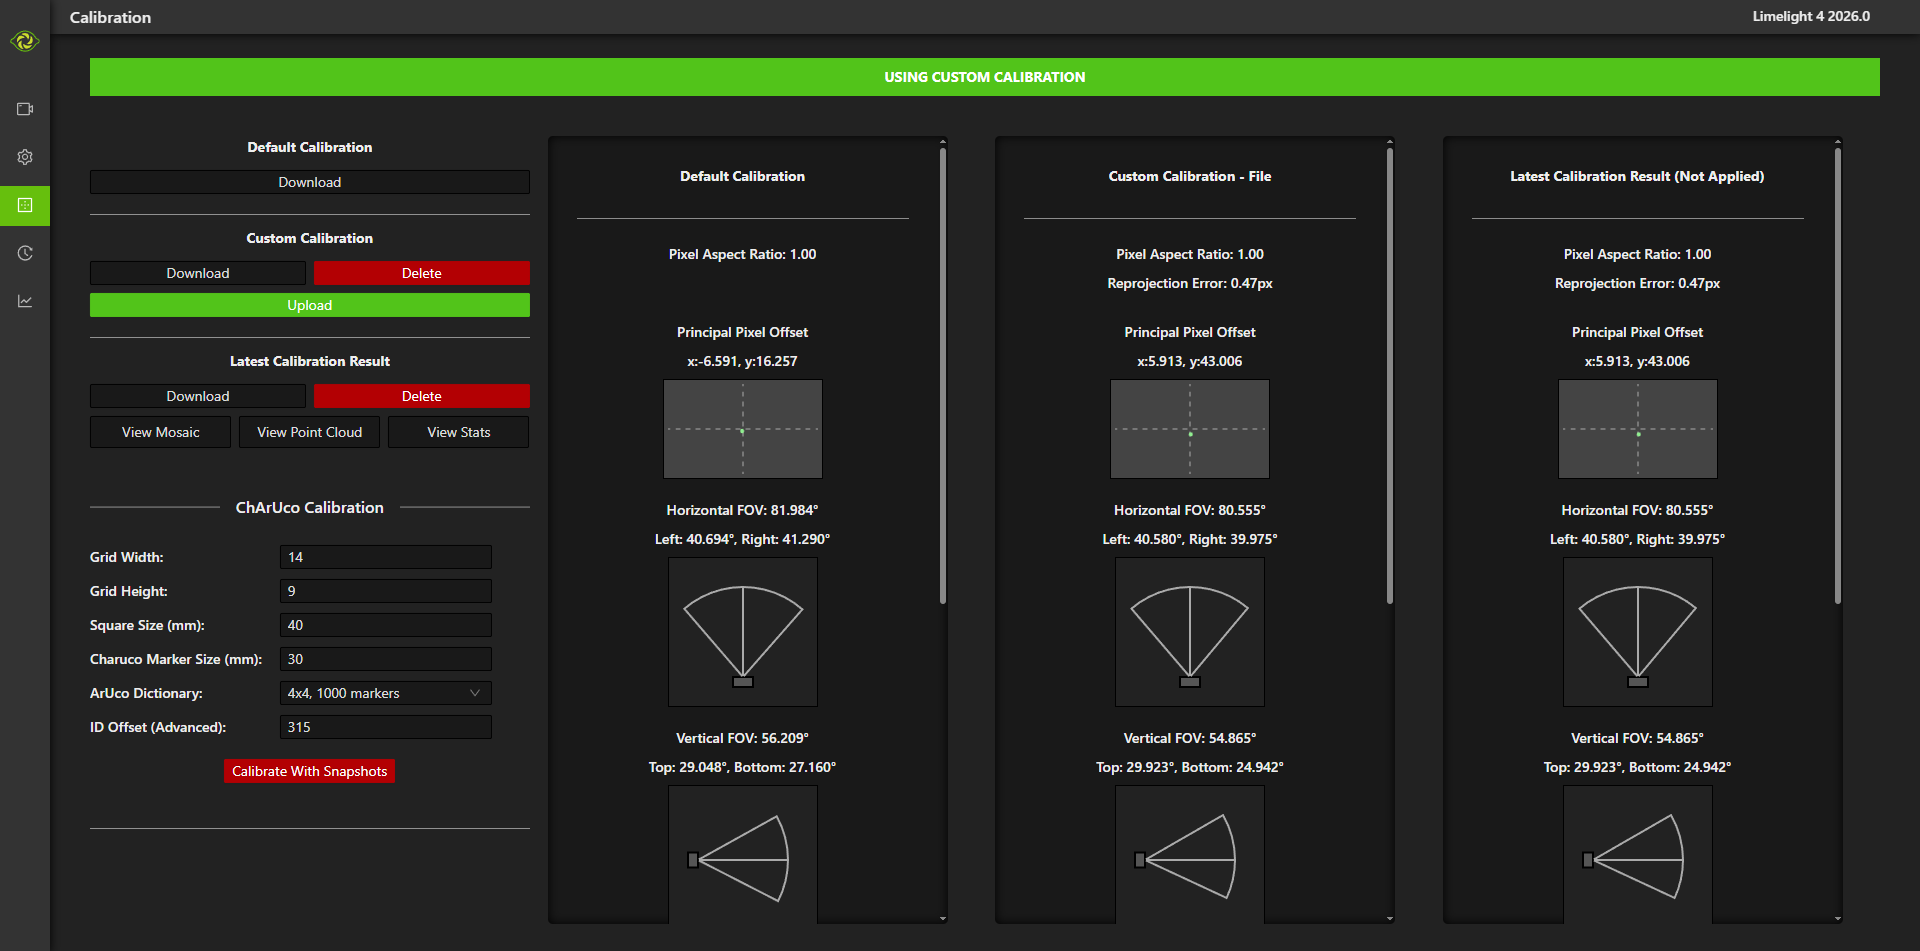
- Upon success, the "Latest Calibration Result" card will show the latest calibration result.
- Check the "Latest Calibration Result" card for a reasonable result with a low reprojection error (ideally less than 1).
- Download the latest calibration result and upload it back to your Limelight.
If a custom calibration has been uploaded, it is automatically used for all targeting pipelines.
-
If a custom calibration is active, you will see a bright green header at the top of the calibration tab.
-
If the default calibration is being used, you will see a yellow warning header.
Troubleshooting and Inspecting Your Calibration
Pixel Aspect Ratio
The calibration result includes a pixel aspect ratio value. A perfect calibration board and camera system will produce a pixel aspect ratio of exactly 1.0, meaning each pixel is perfectly square and the board has no dimensional distortion.
A value other than 1.0 indicates that your board likely has a slight horizontal or vertical stretch. For example, a pixel aspect ratio of 1.01 suggests approximately a 1% stretch in one direction. This is common with printed boards — printers don't always scale X and Y axes identically, and paper or mounting surfaces can warp slightly. Monitors/Displays can also introduce slight stretching due to display scaling, bezel compensation, or non-square pixel mapping.
If your pixel aspect ratio deviates from 1.0:
- Re-measure your board with calipers. Confirm that the square size is truly identical in both directions.
- Check your board for warping or bowing. Even slight curvature can introduce stretch.
- If using a printed board, try reprinting or switching to a rigid manufactured board from a vendor like calib.io.
A pixel aspect ratio between 0.99 and 1.01 is generally acceptable. Values outside this range suggest a board defect that should be corrected before trusting the calibration.
Reprojection Error
The reprojection error measures how well the computed camera model explains the observed corner positions, expressed in pixels. After calibration, the solver projects the known 3D board corners back into each image using the computed camera matrix and distortion coefficients, then measures the distance between the projected positions and the actual detected positions.
A reprojection error of less than 1 pixel is considered good. Lower is better, but values in the range of 0.3–0.8 pixels are typical for a well-executed calibration. If your reprojection error is above 1 pixel, consider capturing more images with better coverage and diversity, and ensure your board is flat and accurately measured.
3D and 2D Visuals
You can view a 3D point cloud and 2D mosaic of all detected charuco board corners right in the web interface.
- The 2D mosaic is the primary tool for dataset improvement. Look for large voids in the image coverage and capture more images to fill them.
- The 3D point cloud helps advanced users understand the geometric diversity of their calibration image sets and catch degenerate configurations where boards are clustered at similar depths or angles.
You can also inspect individual images by entering screenshot mode within your ChArUco calibration preview pipeline.